Guide to configuring and printing labels with I-CASH and Niimbot
With the app iCash Label Printing you can quickly and conveniently create and print item labels directly from an Android device or cash register Daisy Smart, using a mobile Bluetooth thermal printer Niimbot.
This guide describes the steps needed to install the app, connect it to your I-CASH account, add a Niimbot printer and create a label template.
1. Before you begin
Before configuration, make sure you have the following:
- an active I-CASH inventory account;
- an activated API module;
- a Niimbot printer with Bluetooth connectivity;
- An Android device: phone, tablet, next-generation Daisy Smart cash register or another device.
2. Installing the app
To use the label printing feature, you need to install the app iCash Label Printing.
If you use a standard Android device, you can download the installation file here:
If you would like the app activated on your cash register Daisy Smart, contact the I-CASH team:
Email: support@icash.bg
Phone: (+359) 2 960 7123
Business hours: Monday–Friday, 09:00–17:00
The I-CASH team will install it on your Daisy Smart device, with no additional action required from you.
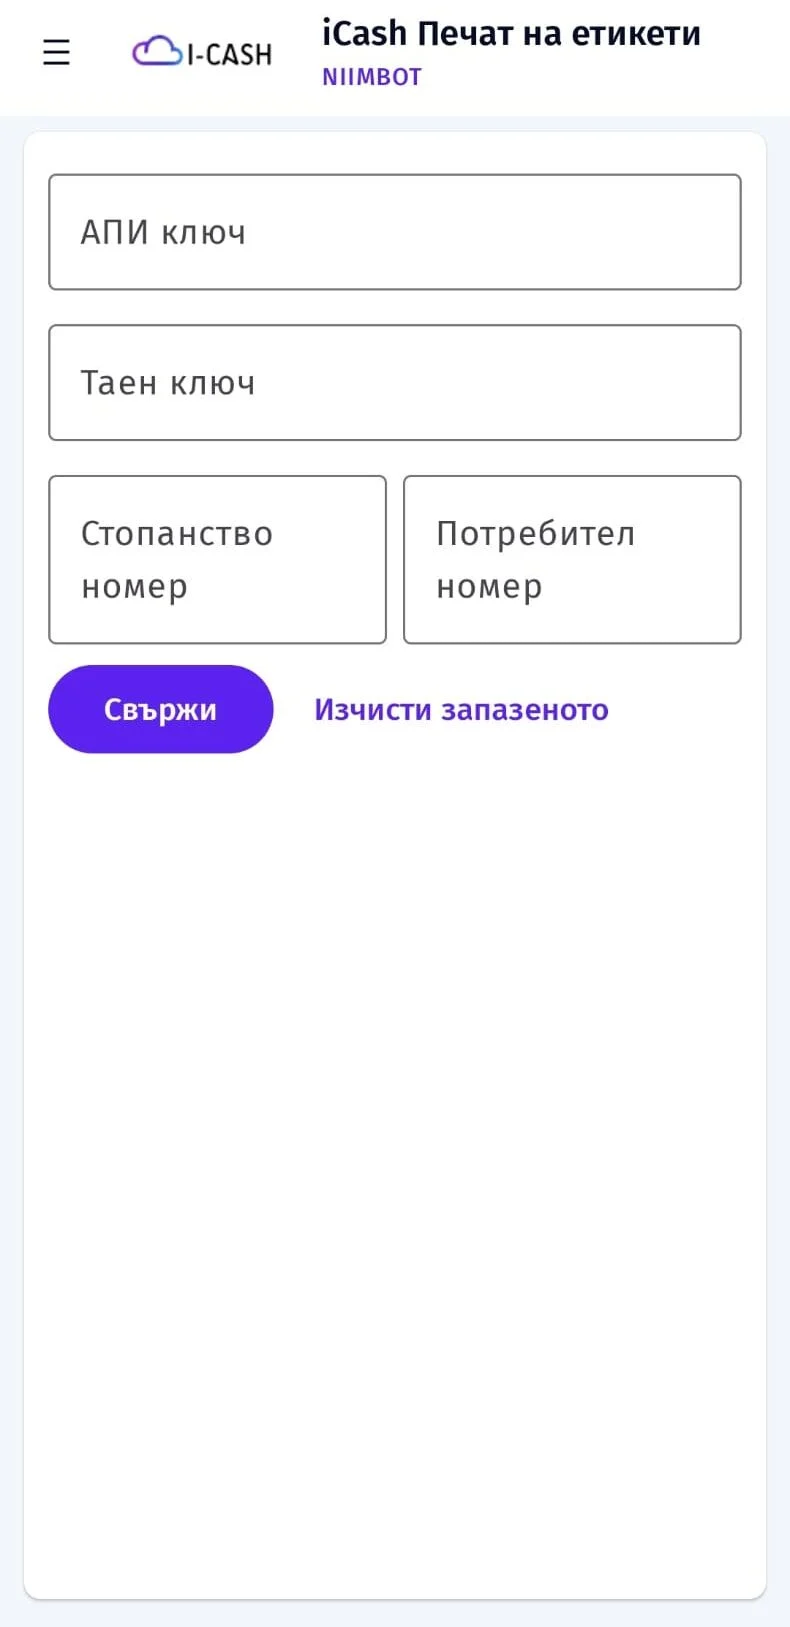
Once the app is installed, launch iCash Label Printing and from the navigation menu, select “Connect iCash”.
Enter the following information in the form that opens:
- API key;
- Secret key;
- Inventory account number;
- User number.
These details are in the I-CASH web platform.
4. Where to find your API key and Secret key
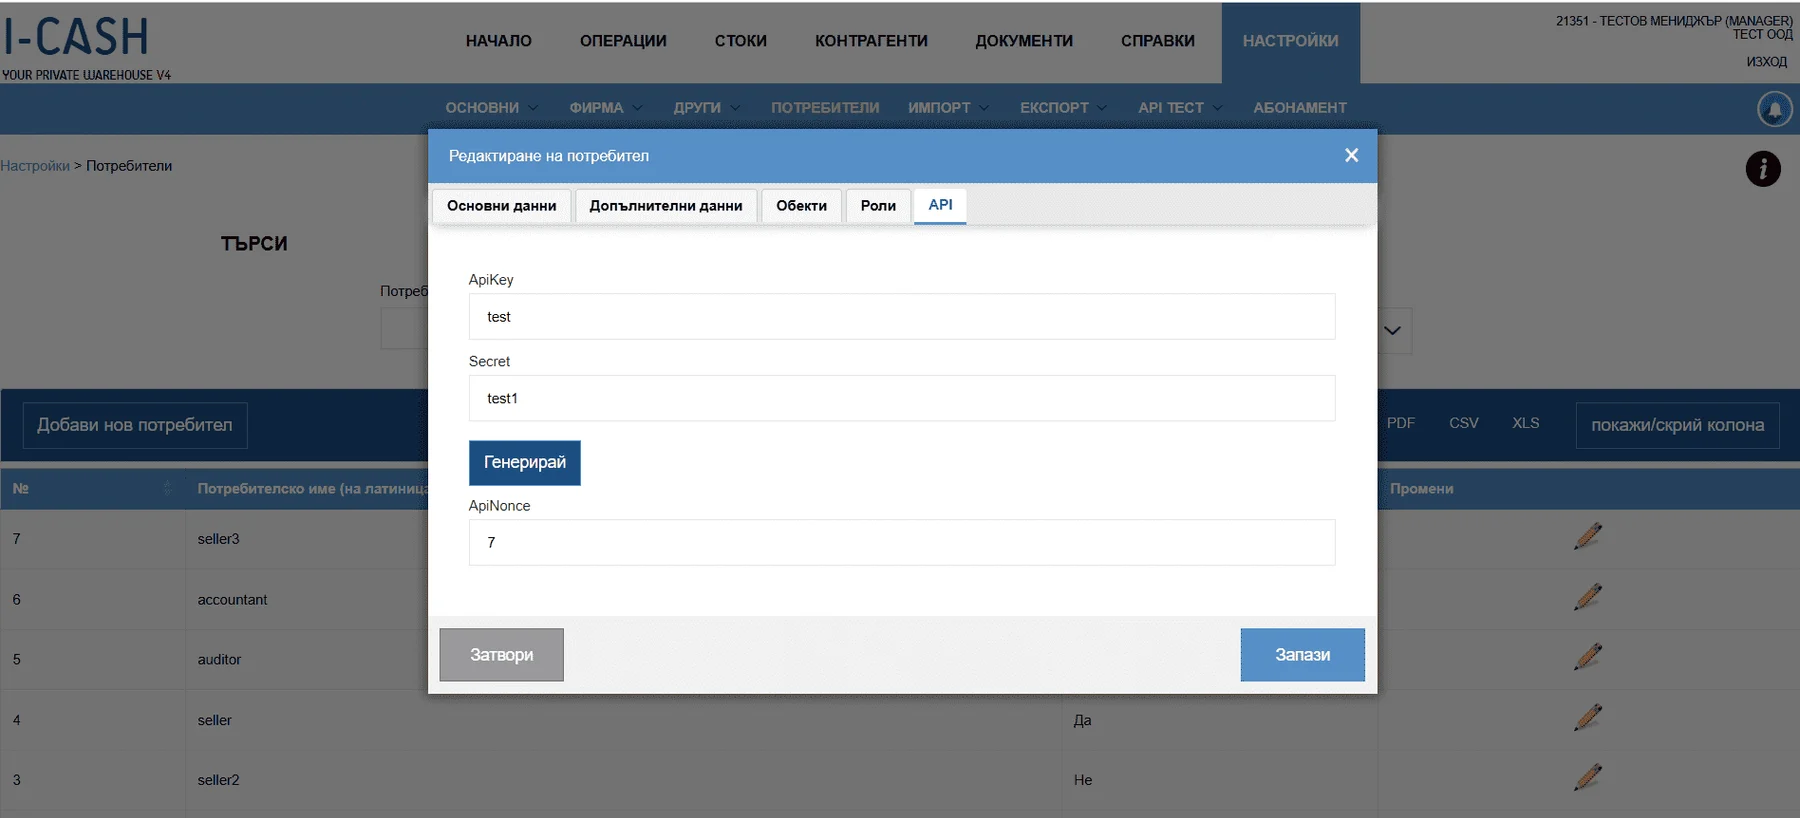
Log into the I-CASH web platform and open your inventory account. Then select:
Settings → Users → Edit user (pencil) → API
Select the user to connect to the label printing app. Make sure the API module is enabled for that profile. In the section API you will find the following data:
- ApiKey — API key;
- Secret — Secret key.
If necessary, replace these values with your own data.
Please note that to connect a particular user, the following must be enabled „roles“:
- Sales;
- Deliveries;
- Item list;
- Item groups;
- system_api;
They are activated under „Roles“ when editing a user;
5. Inventory account number
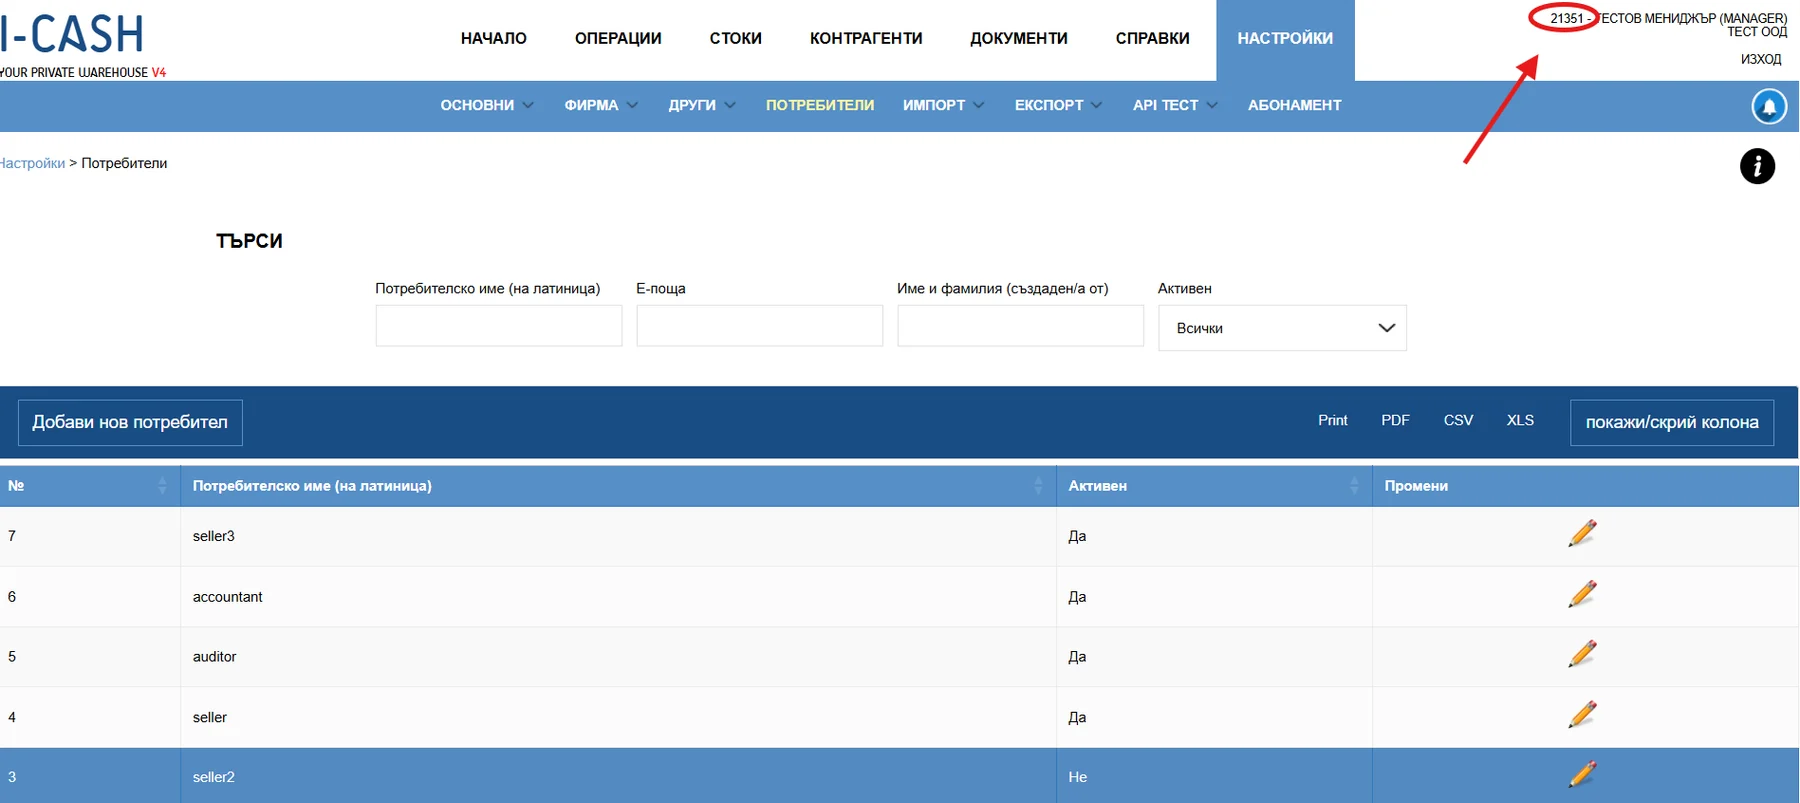
The inventory account number appears at the top of the I-CASH web platform when you are in that account.
This number must be entered in the app in the field:
'Inventory account number'
6. User number
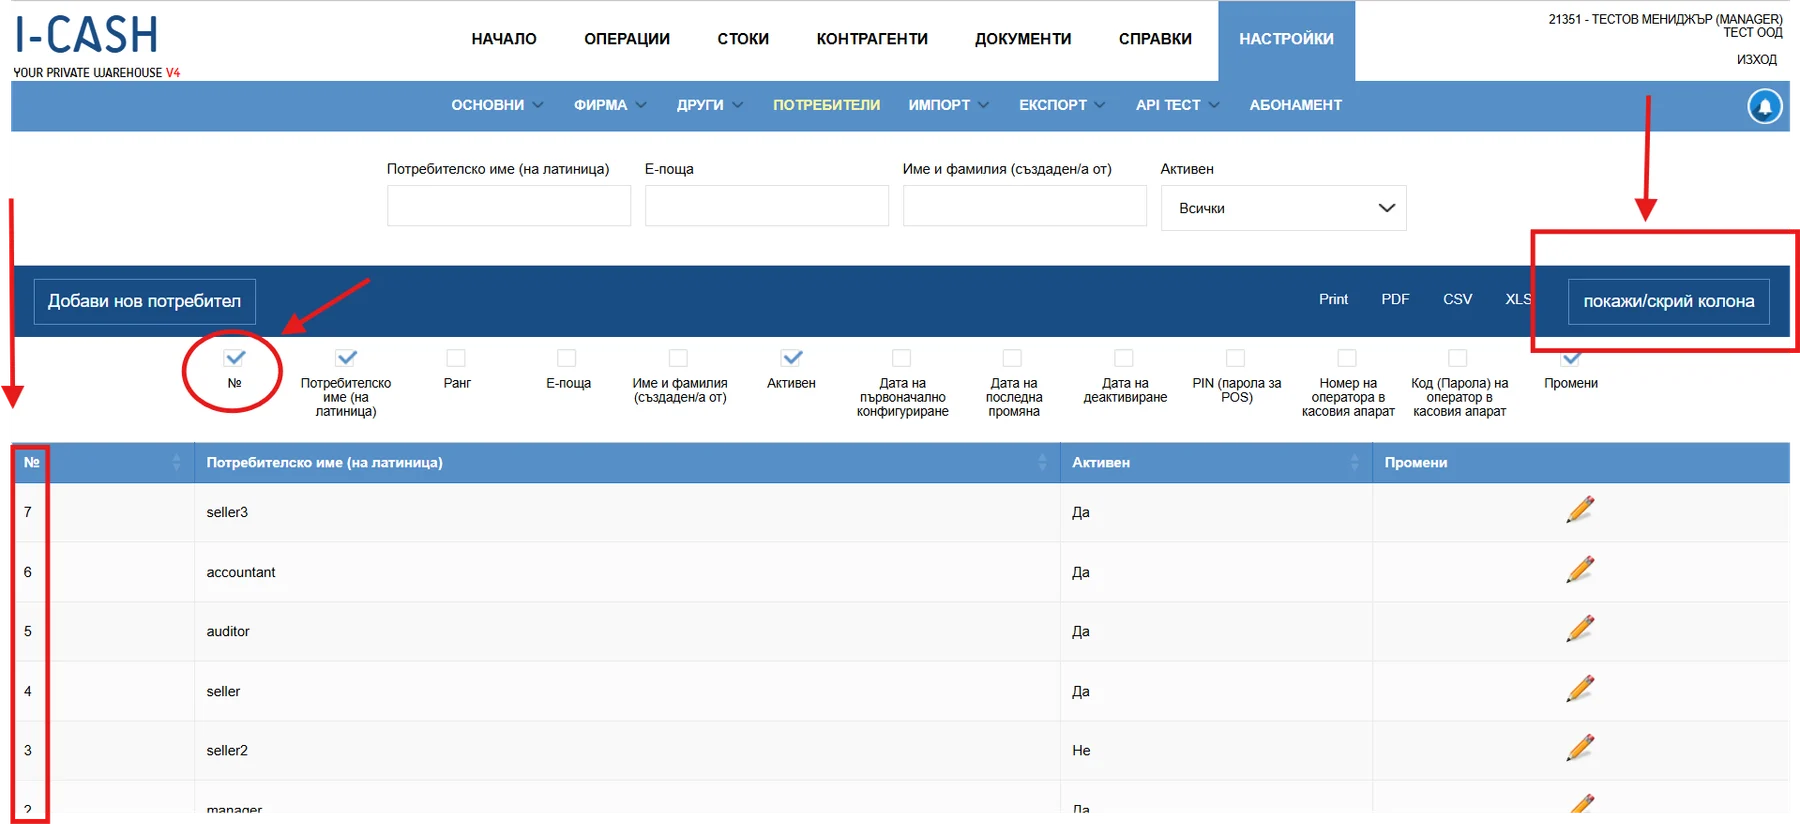
The user number is found in the menu:
Settings → Users
If the user number is not visible in the list, enable the corresponding column using the button:
'Show/hide column'
Once the column is enabled, you can see the user number. Enter this number in the app's user number field.
After successfully entering the API key, Secret key, inventory account number and user number, the application will connect to your I-CASH profile.
7. Connecting a Niimbot printer
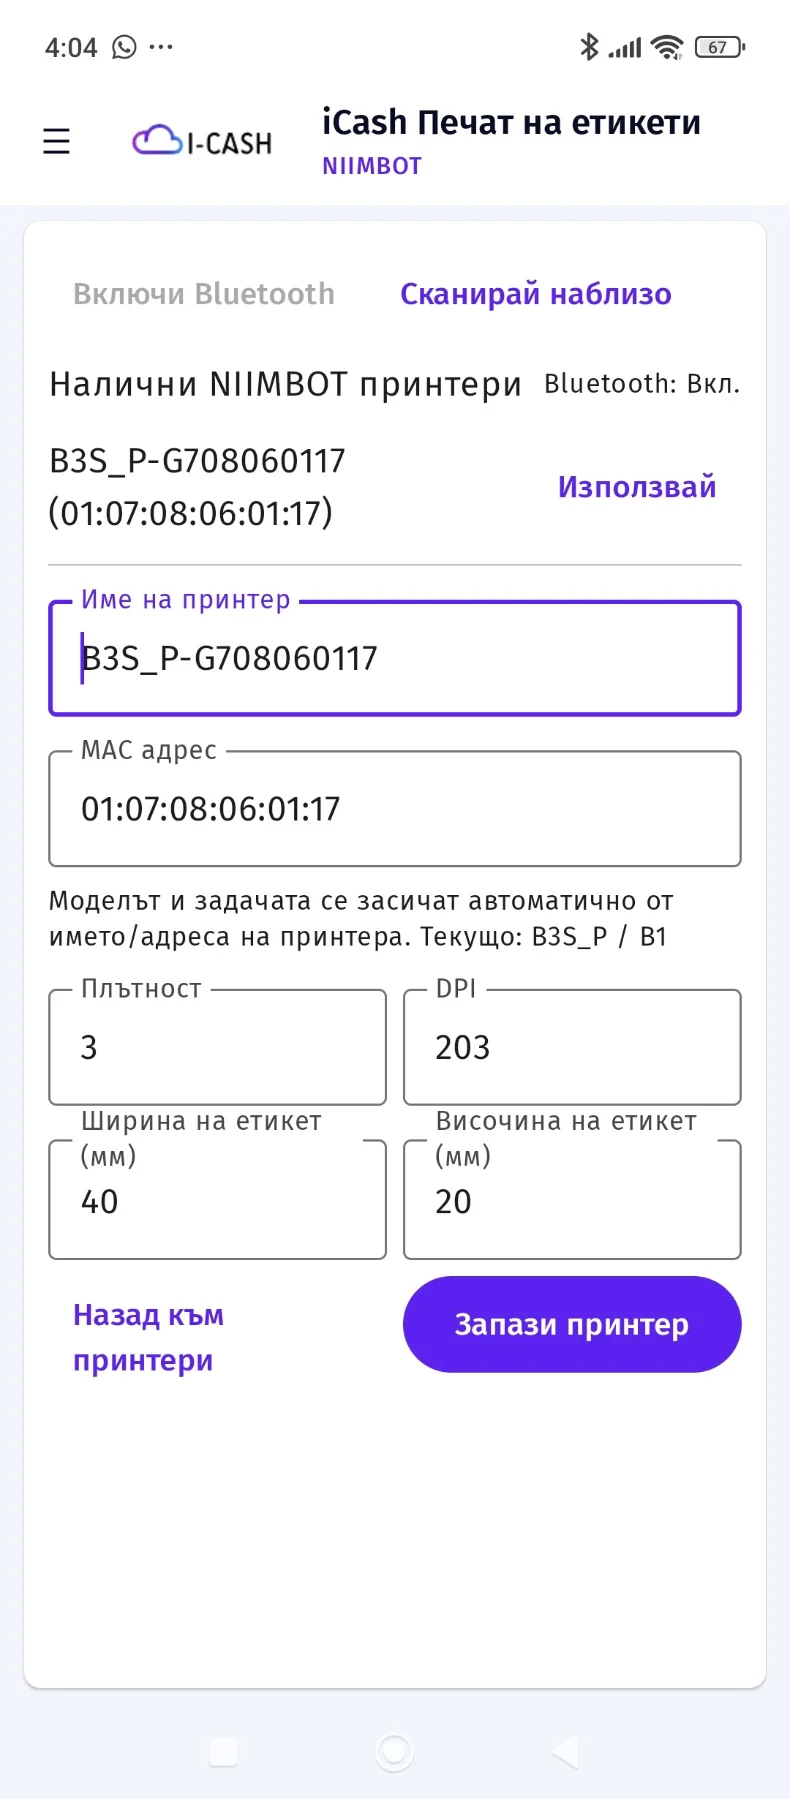
After successfully connecting to your I-CASH account, the app takes you to the menu 'Add Niimbot printer'.
Turn on your Niimbot thermal printer and make sure Bluetooth is enabled on the device.
In the application, select 'Scan nearby'.
Once found, the printer appears in the list of available NIIMBOT printers. Press the button “Use” next to the corresponding printer.
Printer details, such as name and MAC address, are filled in automatically. If necessary, you can review or change the printer name.
To finish adding, press “Save printer”.
Once saved, the printer is added to the app and can be used for label printing.
8. Creating a label template
The next step is to design the label.
To create a template, open the menu: 'Create label template'–> „Add new template“.
Then select the option to add a new template.
With NFC paper, the printer automatically recognizes label dimensions. If the paper does not support NFC, enter the dimensions manually.
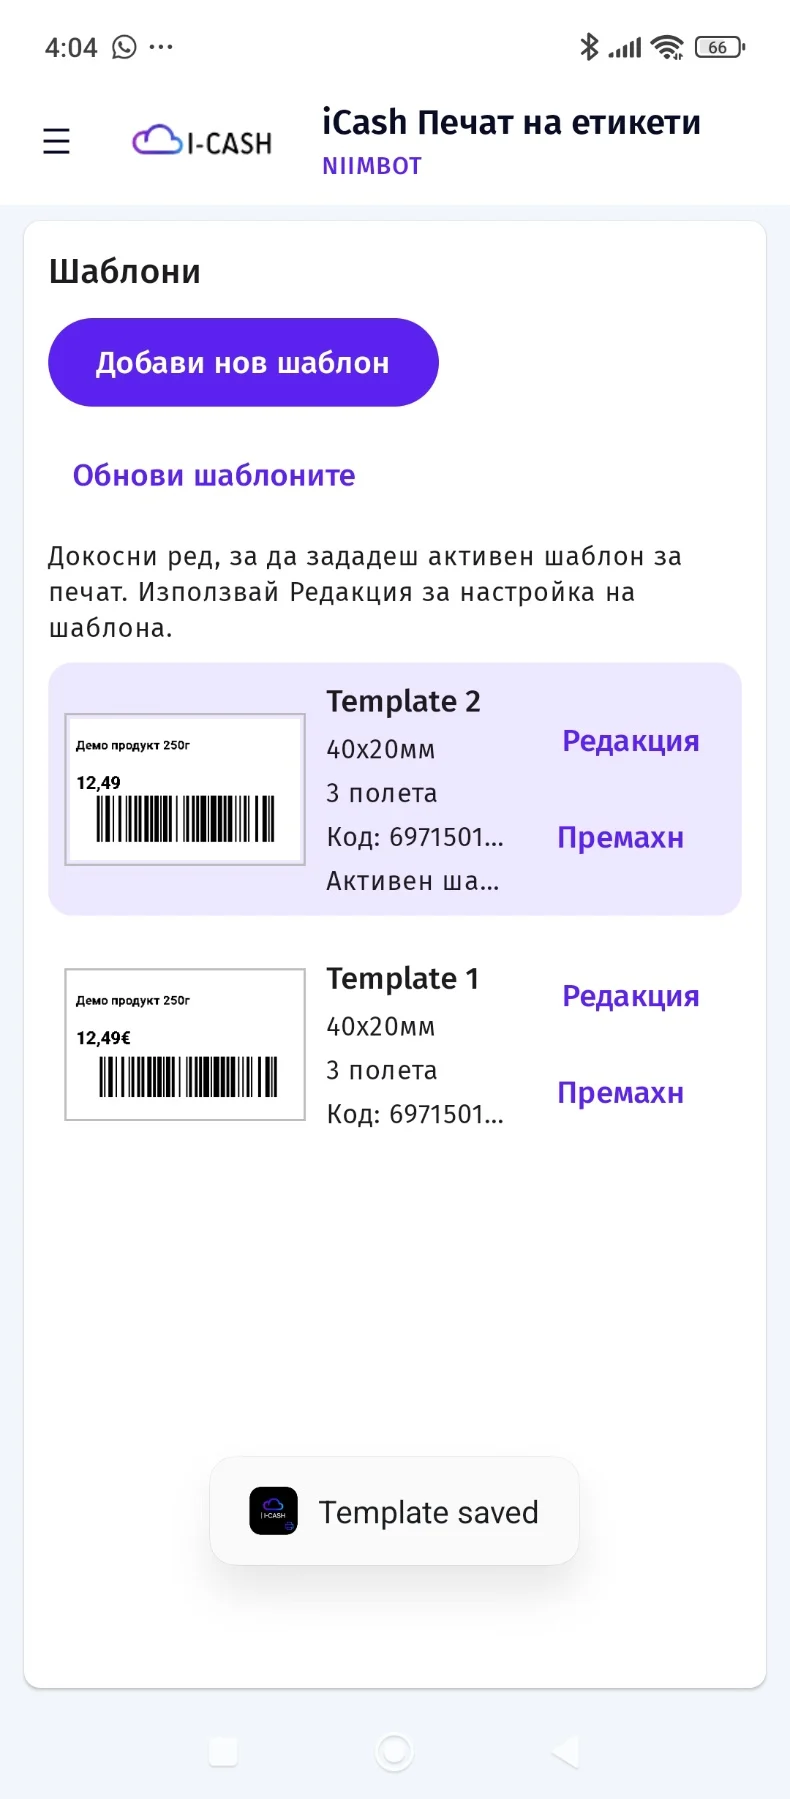
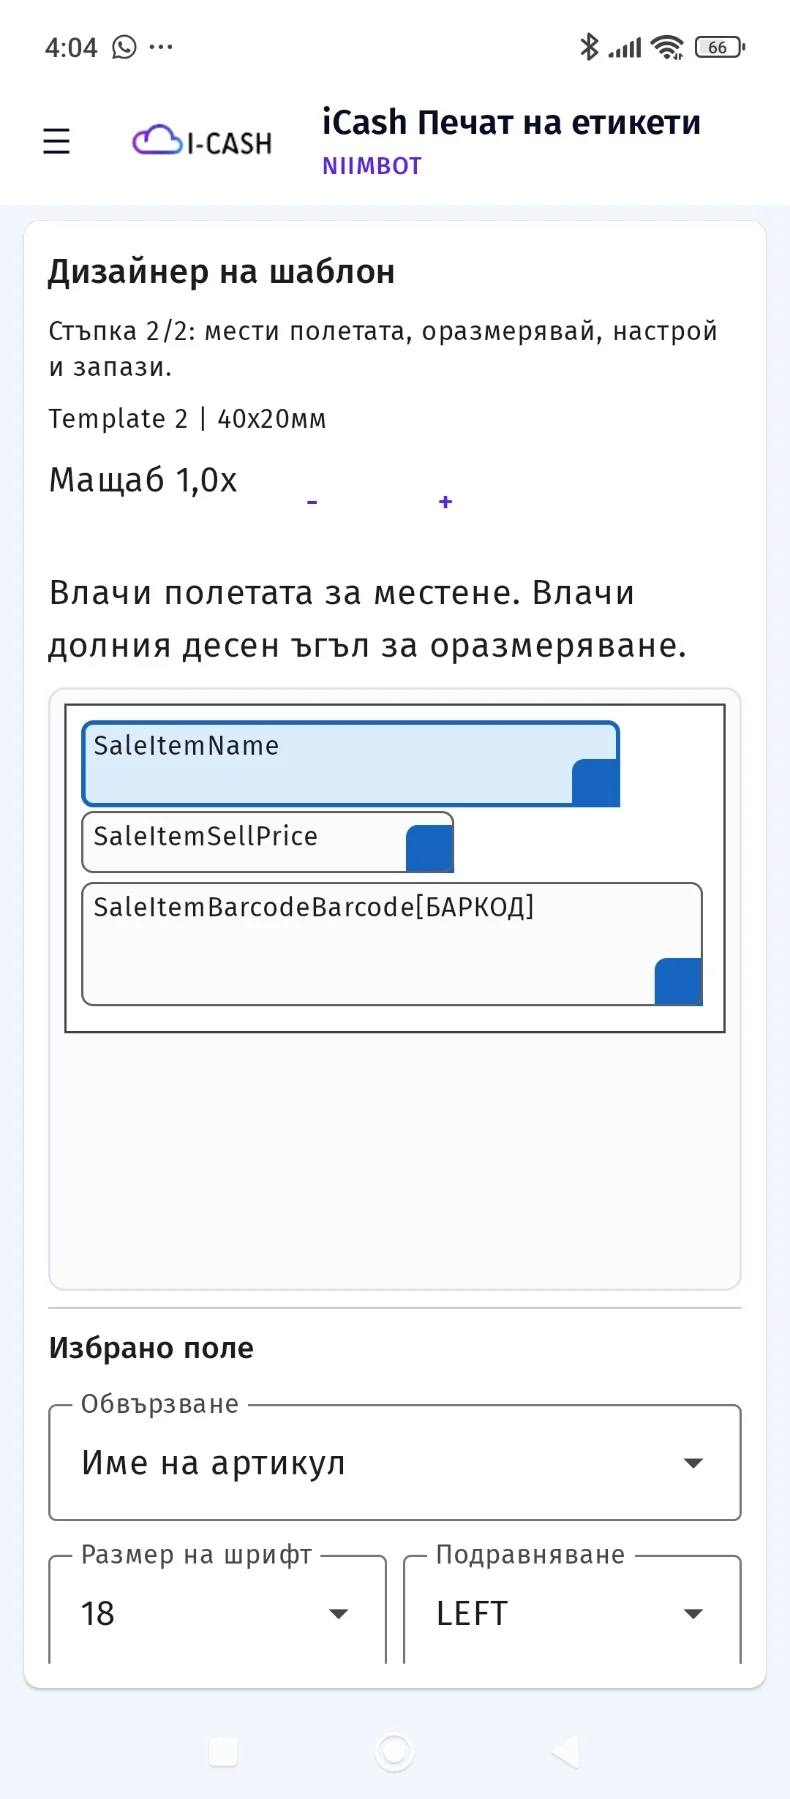
The template editor shows a label with basic fields already added. Each field can be edited to suit your location's needs.
You can:
- reposition fields by dragging;
- resize the fields from the bottom-right corner;
- select the information to display in the relevant field;
- change the font size;
- set text alignment;
- make the text bold;
- hide or show a particular field.
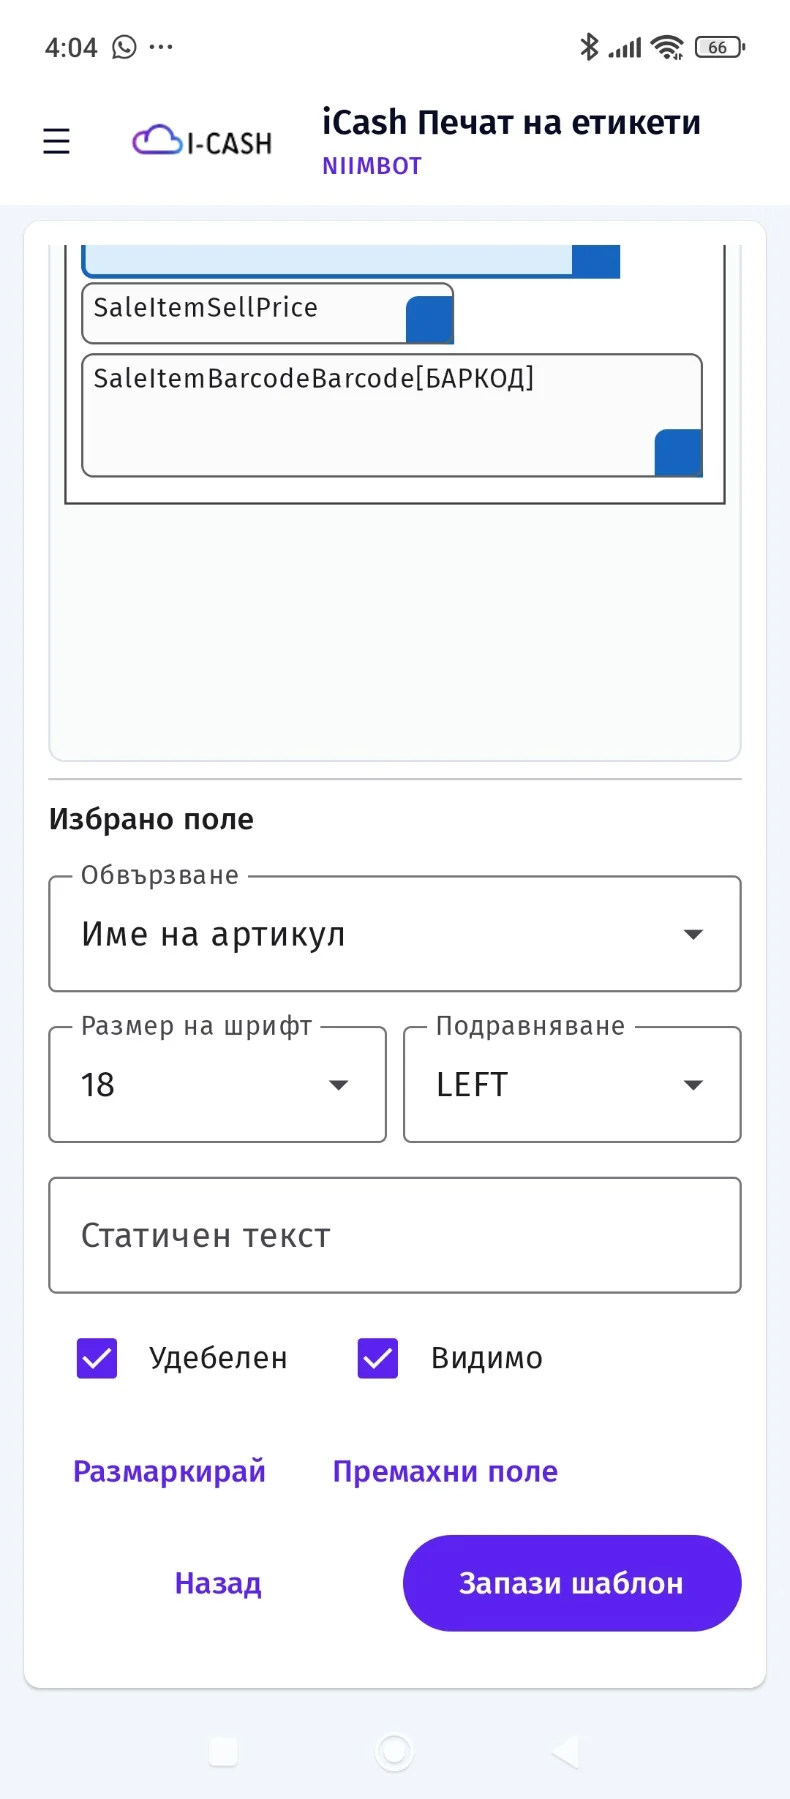
From the section Selected field you can configure the specific field selected on the label.
In the dropdown Linking choose what information loads automatically into the field, for example item name, selling price, barcode and other available values.
In the field Static text you can add a fixed value that is always printed with the selected field. For example, you can add a symbol to a price in euros €, and to a price in BGN— BGN
Once you have configured the fields' position, size and content, press 'Save template'.

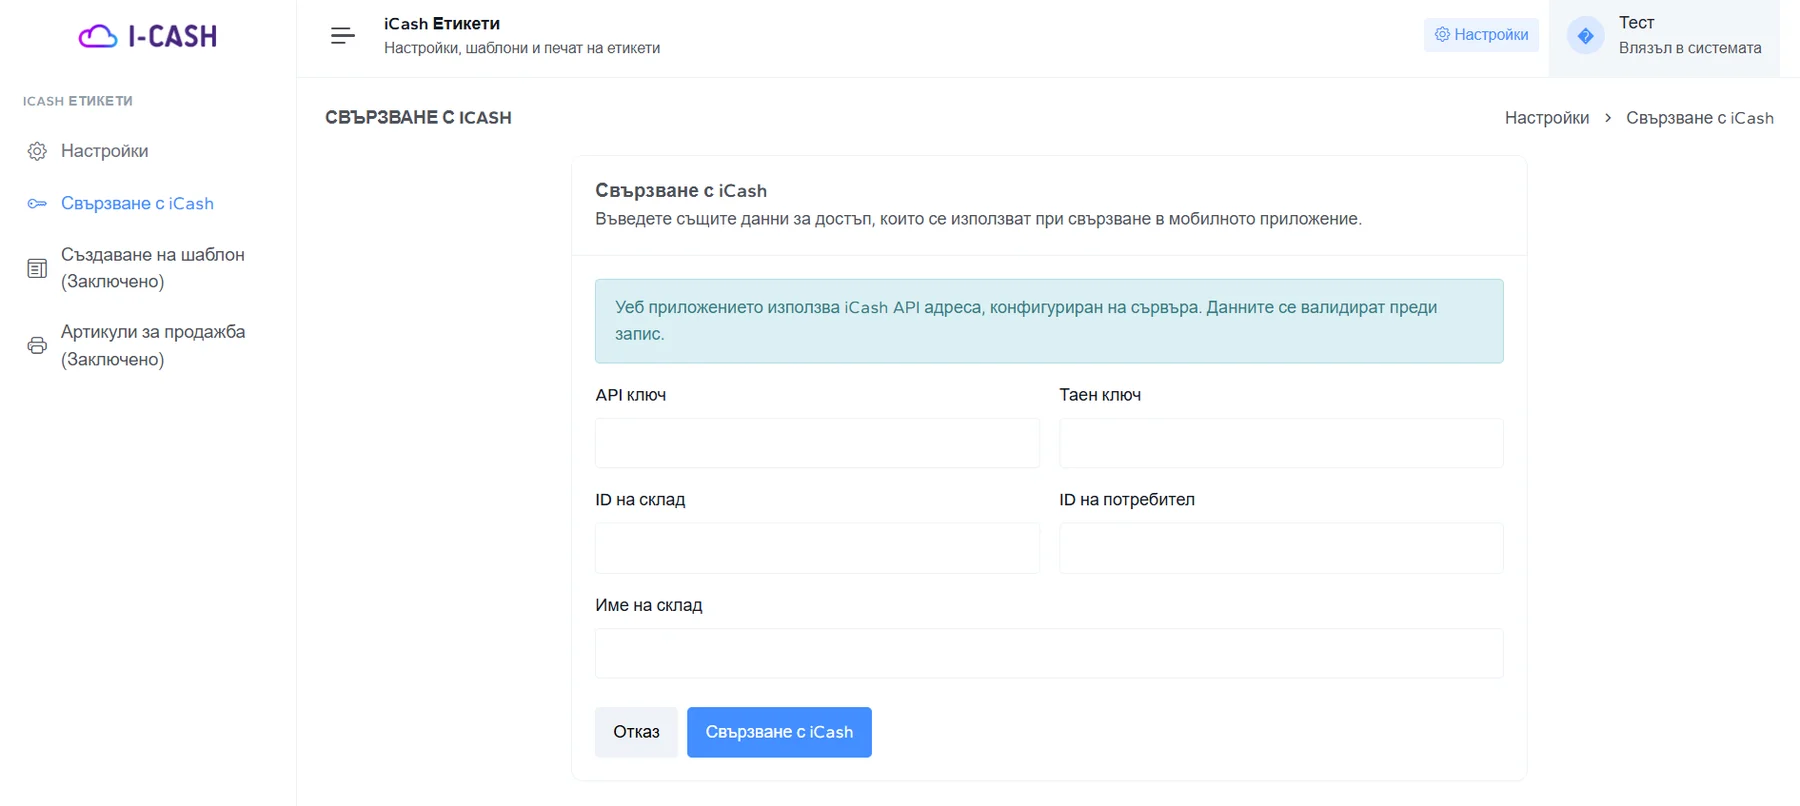
Label templates can also be created through the web platform:
To do this, create a profile and connect your I-CASH account in the same way as in the Android version of the app.
9. Label printing
After successful setup, you can print labels for:
- individual items;
- products from sale;
- products from a delivery;
- other operations related to the inventory account.
Select the desired item or document, choose an appropriate template and start printing through the connected Niimbot printer.
Conclusion
After completing the described steps, the application iCash Label Printing will be connected to your I-CASH account and Niimbot printer.
This lets you print labels quickly and conveniently directly from an Android device or Daisy Smart cash register, without an additional computer.