Connecting a thermal printer
How to connect a Daisy non-fiscal printer
Connecting a non-fiscal printer
First, prepare the master data in your inventory account. Enter your username and password at icash.bg/login and navigate to Settings–Company–Stations. On creation, the program generates one main station (non-fiscal printer). For a restaurant, for example, you can create two stations here: a kitchen printer and a bar printer. There is no limit on the number of stations, regardless of your subscription plan. Navigate to Goods–Item groups and select which item groups will send information to this printer.
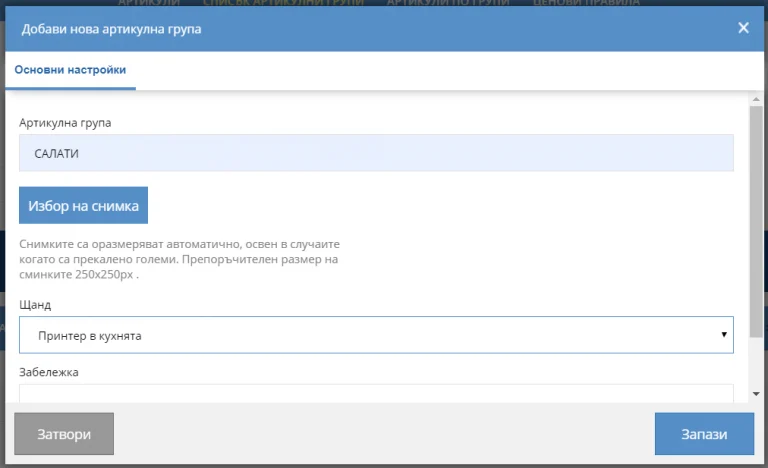
For example, all items in groups such as salads, hot and cold starters, main courses, desserts and so on should be linked to the Kitchen Printer department. Select each group and mark the Kitchen Printer department (see the “Department” image).
All items entered in the listed groups will print on the kitchen printer when selected in the quick sales module and Send to printer is pressed. The next step is to configure the printers in POS.
Start the quick sales module. Go to Menu – Settings – Cash register/Printer. Follow the wizard and select which printer is connected to which COM port; see the image Displaying non-fiscal printers in POS. The procedure is identical to connecting the quick sales module to a fiscal device.
Displaying non-fiscal printers in POS
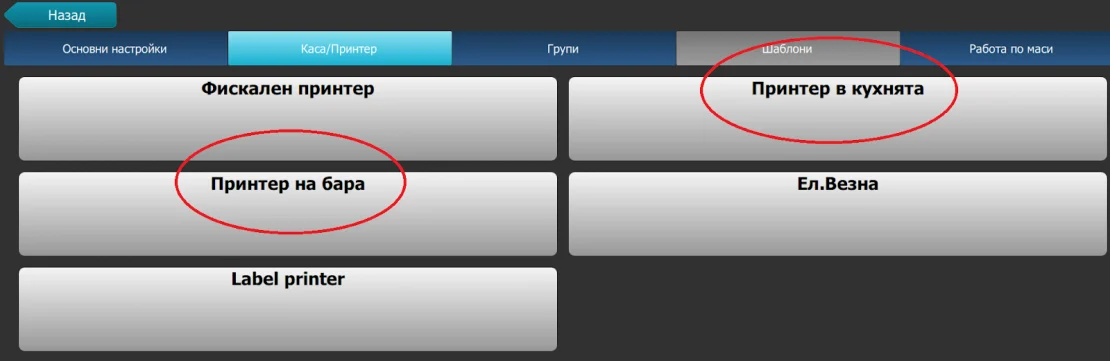
Select a printer, then select the COM port connecting it to the computer and save the settings. Repeat this procedure separately for each printer. You can create several stations that send information to the kitchen. For example: salad station number 1; quick dishes station number 2; main courses station number 3; dessert station number 4. Assign the appropriate station to each item group. Configuring the master data this way produces the following result: regardless of the order in which items are entered, those associated with station 1 will always appear first on the kitchen printer, followed by station 2, and so on.
Additional information and non-fiscal printer settings:
- COM port drivers: depending on the connection method, drivers for RS232-to-USB adapters must be installed.
- Encoding: each thermal printer comes with a disc containing an application for changing print settings
Daisy 20MP – 9600
Daisy 1200 – 9600
Datecs EP50 – 57600
Datecs EP1000 – 57600
Daisy NX21 – BlueTooth
Encoding varies by country
For Bulgaria: Windows 1251